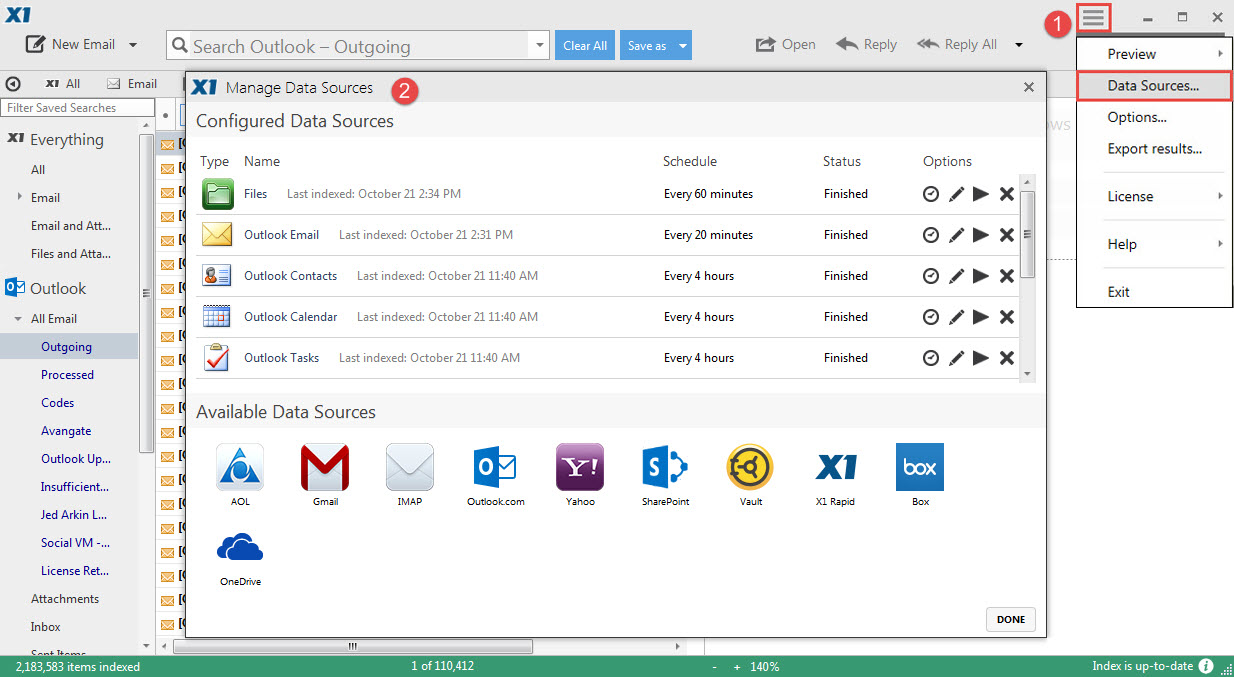
Add and remove sources from X1 Search from the Manage Data Sources menu. Navigate to the Content Options tab by selecting Menu>Data Sources, displaying the Manage Data Sources view.

Configured Sources lists currently indexed applications in X1 Search. Select the ‘pencil' icon to make any changes associated with the source, such as indexing schedules and the types of data indexed. Clicking the ‘X' icon removes the source from your X1 index.
Be careful! Aside from SharePoint, if you choose to remove an application from your X1 index, you will have to re-index all of the content if you decide to add the application back to X1 Search.
Available Sources lists the applications available to add to X1 Search. If you would like to add one of the Available Applications to your Configured Sources list, please follow the steps below:
AOL, Gmail or Yahoo mail
- In the Available Sources list, click the icon for the application you wish to add, displaying the account window.

- Enter your username without the @email.com address; your password for that account; your full name. Your email address will automatically populate.

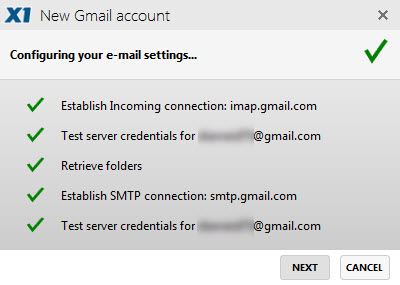
- Click ‘Next’, displaying an authentication screen that walks you through configuring your email account by displaying green check marks after each step. When the process completes, click the ‘Next’ button.

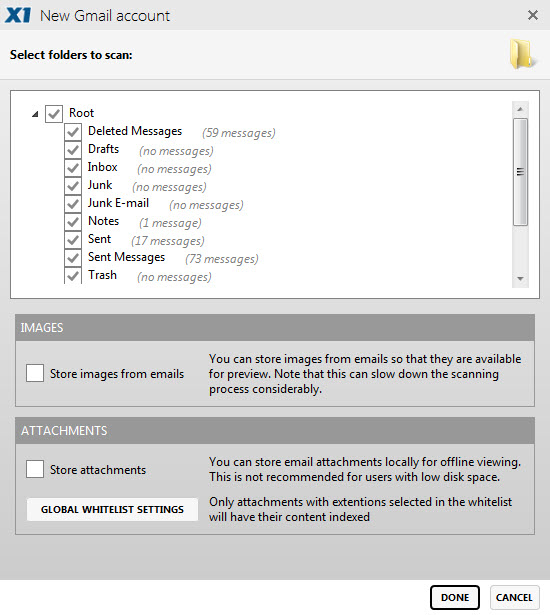
- The next window, labeled ‘Select Folders to Scan’ displays all of the available folders in your email account that you may add to your X1 Search index.
Select or deselect folders by checking or unchecking each folder's corresponding box.
- When satisfied with your selections, click ‘Done’.
After completing the steps above, X1 Search will immediately start indexing your account and you should see your Results List begin to populate. YES, X1 Search’s indexing IS that fast!
** Note ** The visuals show how to add your Gmail account, but the process is relatively similar for adding any data source. Follow the on-screen instructions for any other data source you wish to add.
0 Comments