Saving Searches saves time. If you find yourself repeatedly running the same search within any of the data sources or views, you should create a Saved Search.
For instance, let's say you have been in the midst of writing a memo on enterprise search. Throughout the research, you have created and received countless documents recording and organizing your research. So many in fact that you find yourself searching for them in X1 Search several times a week!
This is the ideal case for a Saved Search. Within your Documents source create a saved search by doing the following:
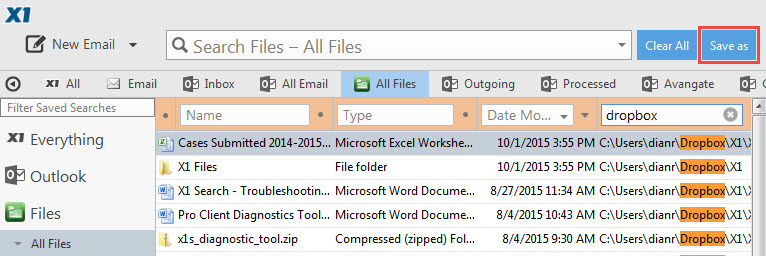
- Enter your search terms in either the general search field and/or refining columns. In this case, 'Dropbox'' is typed in the Path refinement column, returning all documents with Dropbox in the file path.
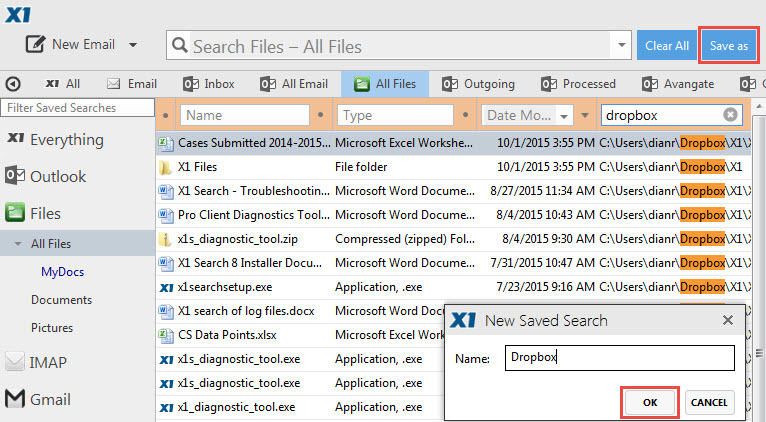
- Click the 'Save as' icon next to the General Search field, displaying a 'New Saved Search' dialog box.

3. Enter your search name (Enterprise Search), and click 'Ok'.

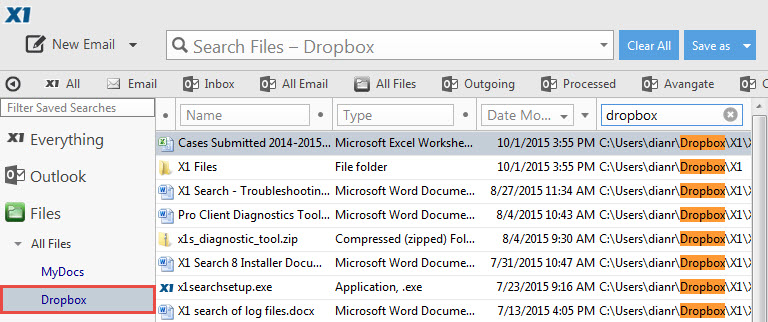
Your Saved Search will appear under the Source and View where it was created. For our example, Annual Reports would appear under your Files source. In other words, it will behave like other Source connectors.

When you choose a Saved Search from your Source list, the results pane will immediately populate with matching hits. Please feel free to refine the Results List as needed by adding additional parameters or terms. Hitting the Clear button, will clear out any refinements you have made and leave the results for the saved search.
0 Comments